How to Use a MacBook as an Amplifier Using GarageBand '11
Post by on May 17, 2012
In 2003, someone posted an article on how to use a MacBook as an amplifier. However, things have changed a bit in the last nine years. The "Audio MIDI Setup" tool no longer allows play-through. Then, in 2008, someone else posted on this topic, but the instructions were incomplete. Thus, I will here attempt to offer a complete tutorial.
What You Need
- GarageBand
- A built-in microphone or a device, such as a microphone, plugged into the audio-in port
Overview
- Create a Project
- Setup the Instrument
- Turn the Monitor On
- Select Input Device (if needed)
- Amplify Using the Equalizer
* NOTE: Enlarge a photo by clicking on it.
Step 1: Create a New Project
Just as it sounds, when you open up GarageBand you will have to create a new project.
Step 2: Setup the Instrument
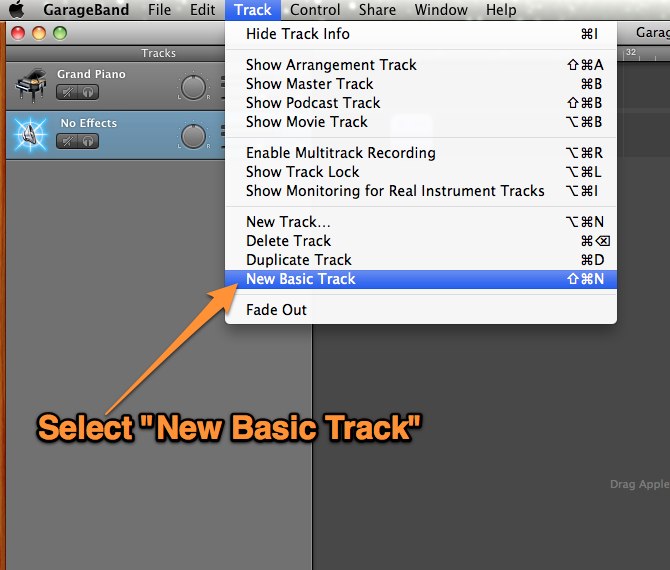
Next, create a new "Basic" track by going to Track->New Basic Track.
Step 3: Turn the Monitor On
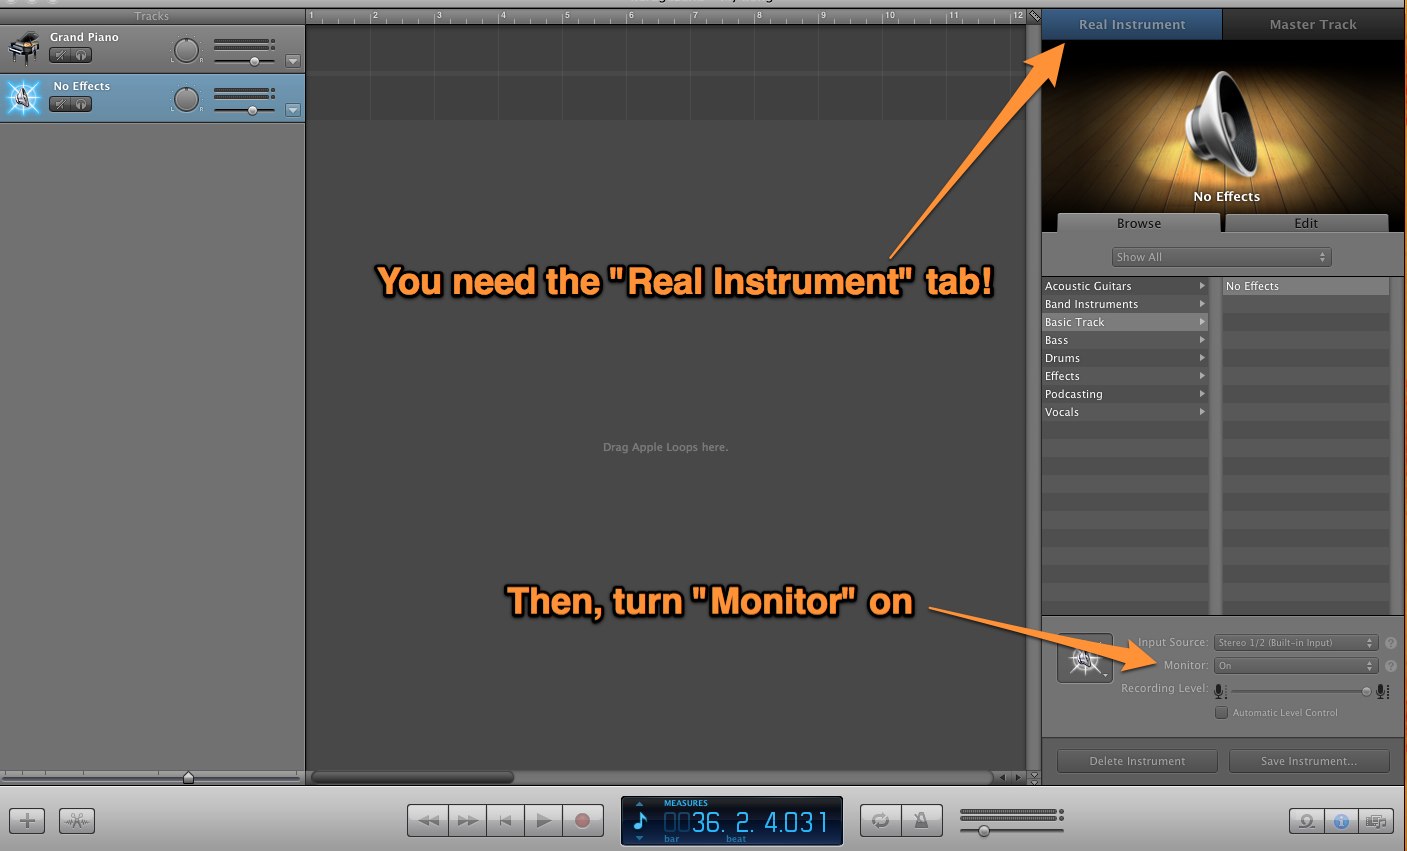
Now, you should be able to see "Real Instrument" at the top right. Near the bottom right there is a drop down for "Monitor"--select "On".
Step 4: Select Input Device (if needed)
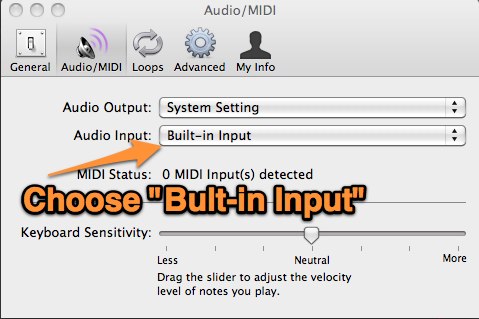
If you are not using the built-in mic and are using the built-in input, you will have to go to Preferences (COMMAND + ,) and select "Built-In Input" under the Audio/MIDI tab.
Step 5: Amplify Using the Equalizer
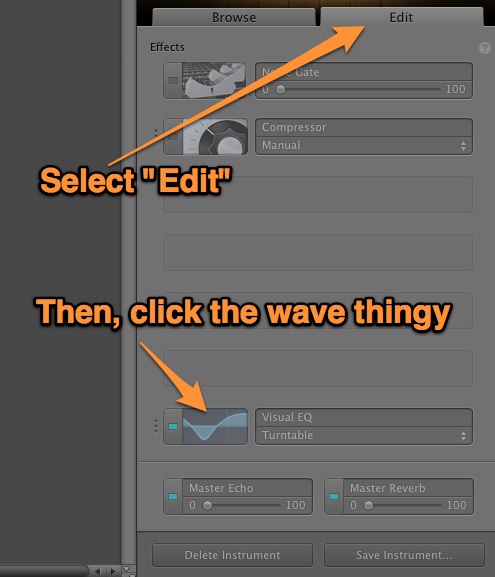
Now, you should be hearing sound in your speakers. If you are not, you did something wrong or the sound is still too low. So, we are going to amplify the sound. Close out of the preferences pane (obvious) and click the "Edit" tab on your instrument and click the wave thingy next to "Visual EQ".
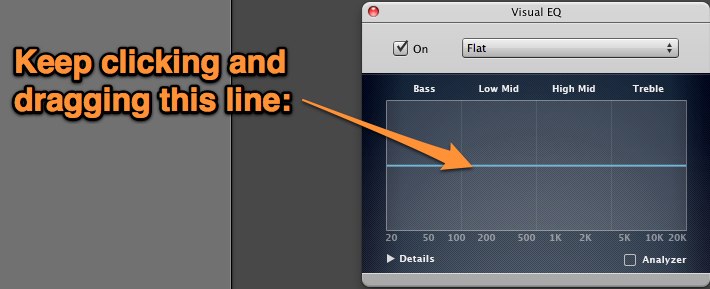
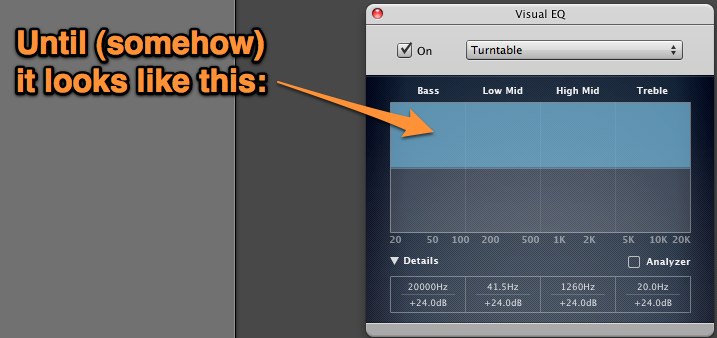
This will open up the equalizer screen where you will see a blue horizontal line. Click the line and drag it upward to amplify the sound.
Keep clicking and dragging the line until somehow it gets as magnified as you can make it, or as much as you want it to be.
